> For the complete documentation index, see [llms.txt](https://docs.globo.io/llms.txt). Markdown versions of documentation pages are available by appending `.md` to page URLs; this page is available as [Markdown](https://docs.globo.io/globo-mega-menu/manage-menu-items/upload-custom-icon-for-menu-item.md).
# Upload Custom Icon for Menu Item
Add a built-in or custom icon next to a menu item.
An icon next to a menu title helps shoppers scan the menu faster, for example a 🔥 next to *Sale* or a small logo next to a brand. You can pick an icon from the built-in library or upload your own image.
## Add an Icon
{% stepper %}
{% step %}
### Open the item
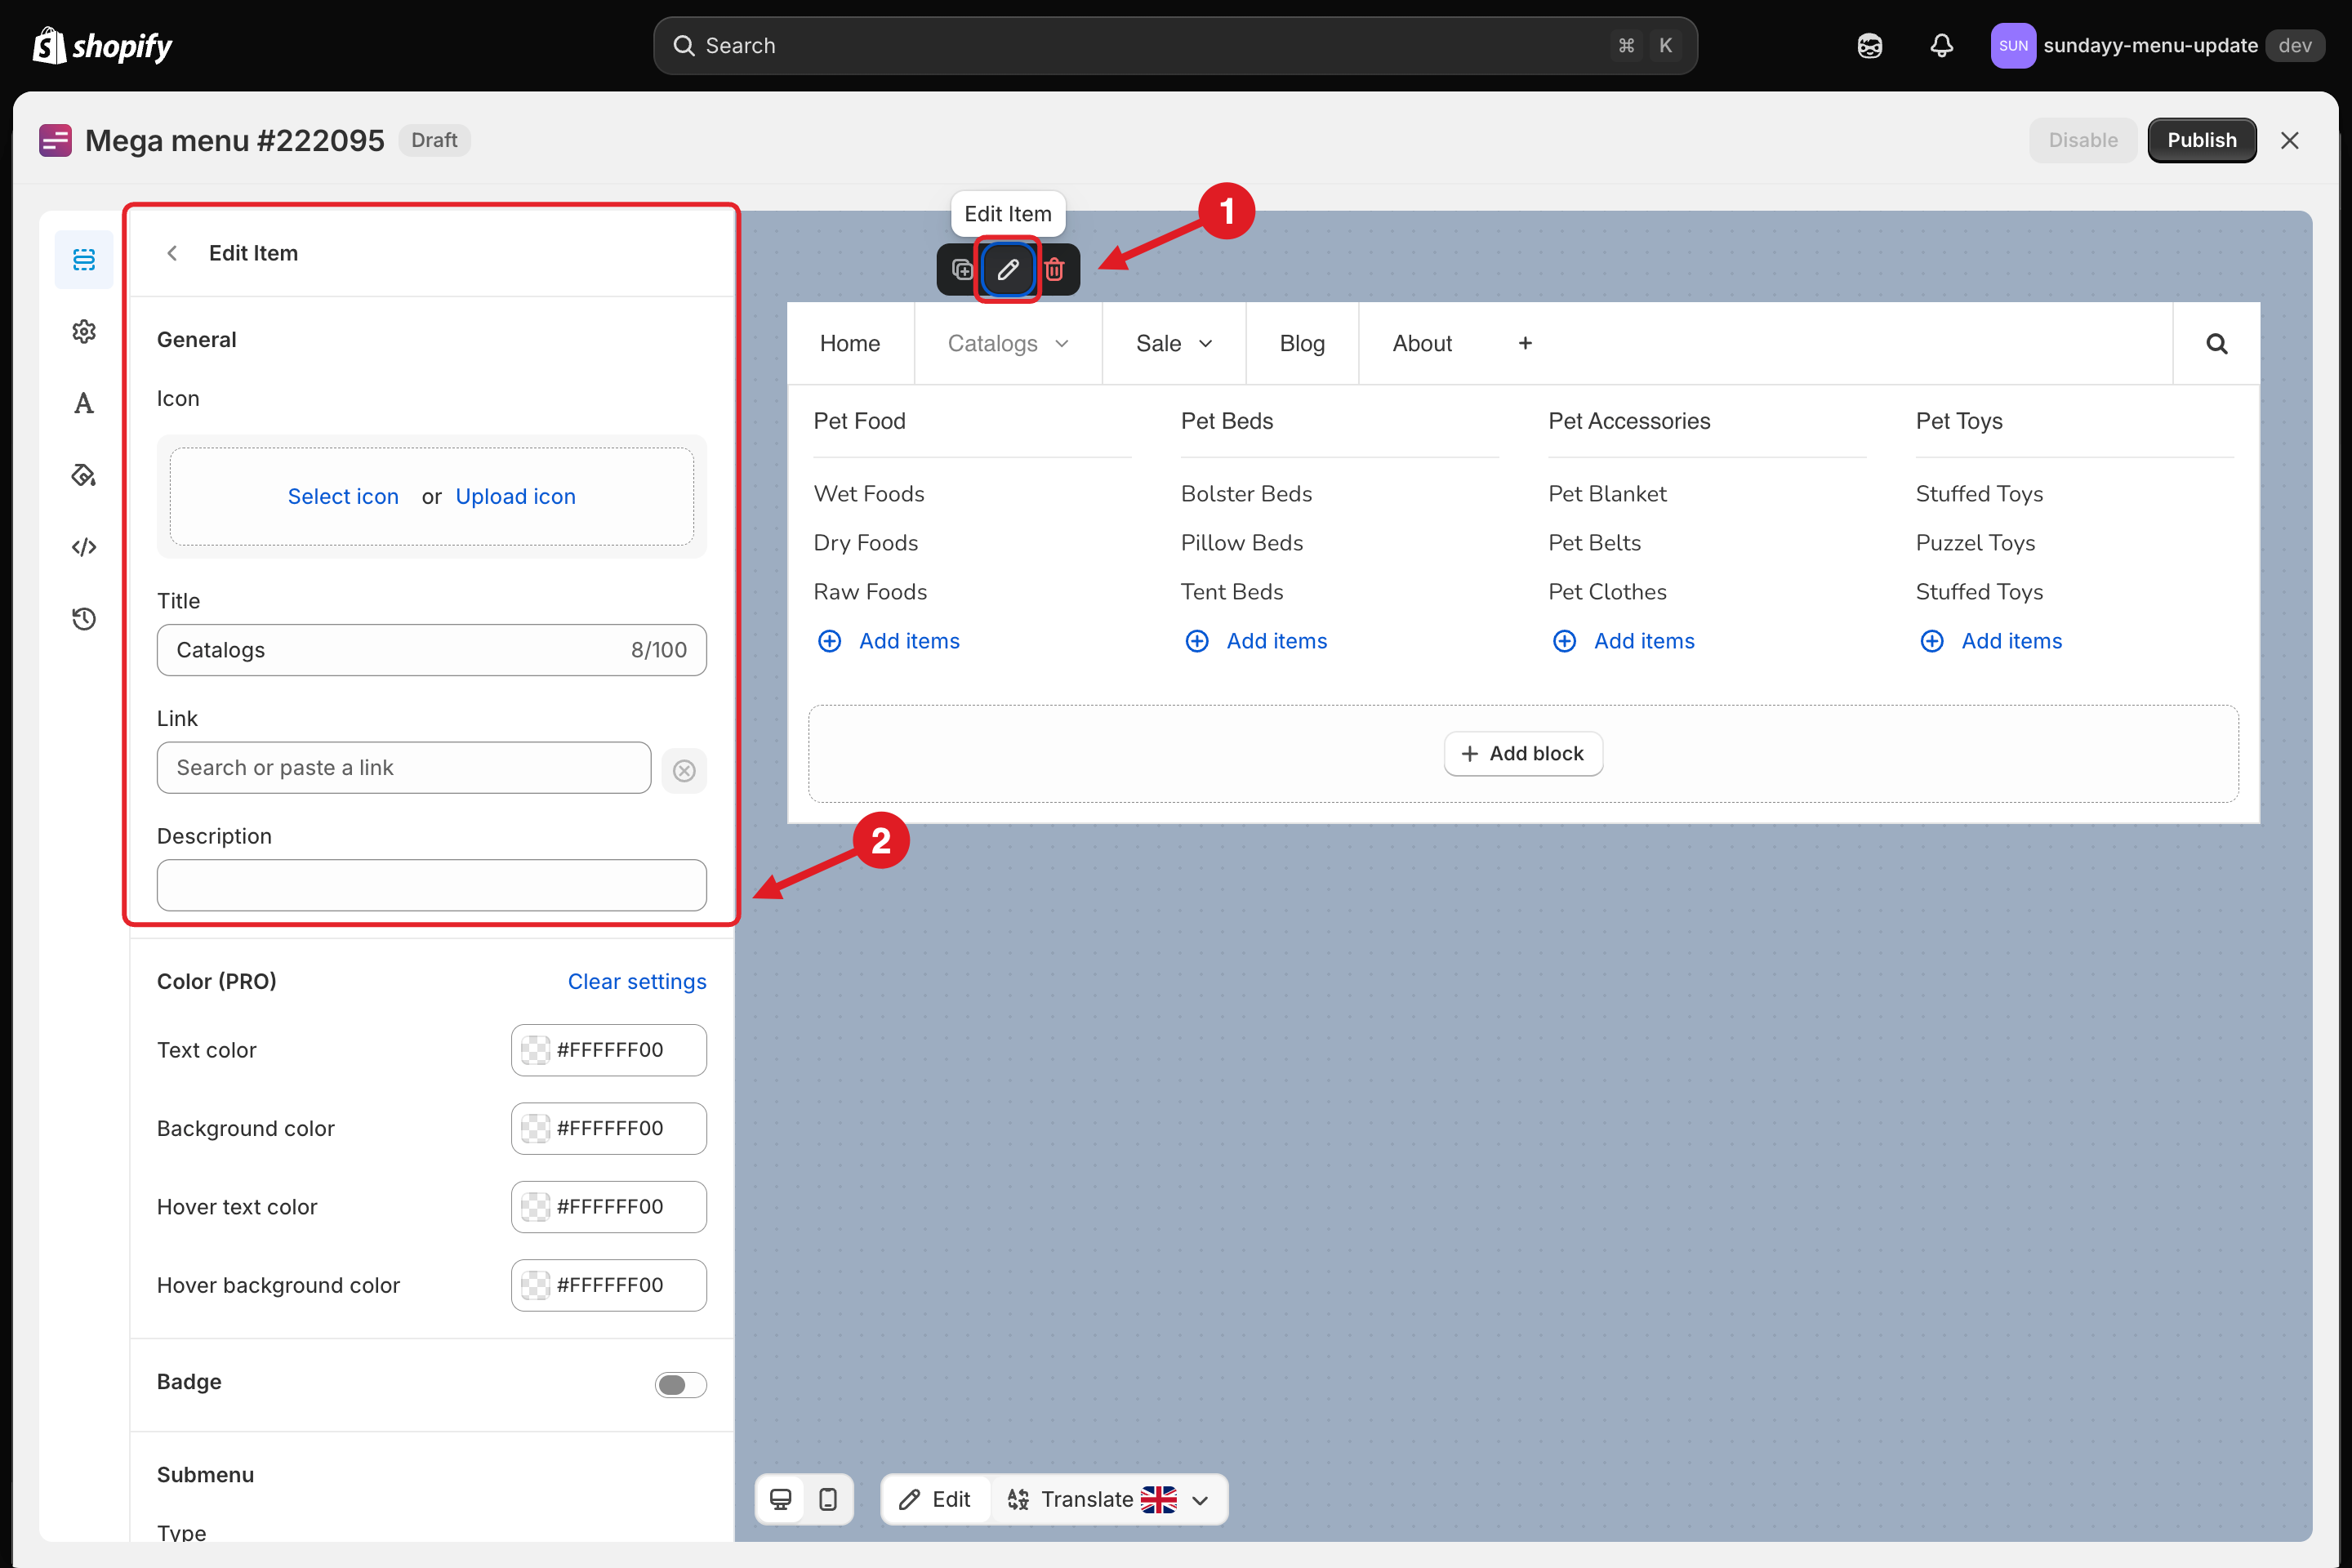
Hover over the item in the preview and click ✏️ **Edit Item** (1). The **Edit Item** panel opens on the left (2), with the **Icon** field at the top of the **General** section.
1. Click Edit Item · 2. The Icon field is at the top of the panel
{% endstep %}
{% step %}
### Choose where the icon comes from
In the **Icon** box, click one of the two links:
{% tabs %}
{% tab title="Select icon (library)" %}
1. Click **Select icon**. The **Select icon** panel opens.
2. Type in the **Search** box to find an icon, for example `heart` or `truck`.
3. Click the icon you want. It's added to the item right away.
Library icons use the item's text color, so they usually match your menu without extra styling.
{% endtab %}
{% tab title="Upload icon (your image)" %}
1. Click **Upload icon**. The **Images** panel opens with the images you've already uploaded.
2. Drop an image into the upload area, or click it to choose a file from your computer.
3. Click the image to select it, then click **Select**.
Uploaded images are kept in the **Images** panel so you can reuse them. To remove one from the library, select it and click **Delete**.
{% endtab %}
{% endtabs %}
{% hint style="info" %}
For best results upload a square **PNG**, **JPG** or **SVG** image around **60×60 px**. Images must be **2 MB or smaller**, otherwise you'll see *"The image may not be greater than 2MB. Please resize and reupload"*.
{% endhint %}
{% endstep %}
{% step %}
### Set the icon width (uploaded images only)
When the icon is an uploaded image, an **Icon width** setting appears:
* **Auto**: the image keeps its natural size.
* **Custom**: enter a value and pick a unit (**%**, **px**, **em** or **rem**), for example `24px`.
{% endstep %}
{% step %}
### Save and publish
Click **Save** in the top bar, then **Publish**.
{% endstep %}
{% endstepper %}
## 🔄 Change or Remove an Icon
Once an item has an icon, the **Icon** box shows it with a **Change** button. Click **Change** and choose:
* **Select icon**: pick a different library icon.
* **Upload icon**: use a different image.
* **Remove**: remove the icon from the item.
## 💡 Tips
* Use the same style (outline or filled) and size for all icons in one menu so they look consistent.
* If an uploaded icon looks blurry, upload it at twice the size you display it (for example 48×48 px for a 24 px icon) and set a **Custom** width.
* You can use a different icon per language in [translate mode](/globo-mega-menu/manage-menu-items/translate-menu-items.md).
***
### Related Articles
{% content-ref url="/pages/juoC3naBGncW8PAmEsCr" %}
[Edit Menu Item](/globo-mega-menu/manage-menu-items/modify-main-menu-item.md)
{% endcontent-ref %}
{% content-ref url="/pages/ifslWIMwuyJG9dfRDMz6" %}
[Add Main Menu Item](/globo-mega-menu/manage-menu-items/add-main-menu-item.md)
{% endcontent-ref %}
***
**💬 Need help?**
Email us at **📧** [**contact@globo.io**](mailto:contact@globo.io) - we’re happy to assist!