> For the complete documentation index, see [llms.txt](https://docs.globo.io/llms.txt). Markdown versions of documentation pages are available by appending `.md` to page URLs; this page is available as [Markdown](https://docs.globo.io/options/product-personalizer/layer-settings/curve-and-auto-fit.md).

# Curve and auto-fit width

Bend a single line of text along an arc, and shrink it automatically when it gets too long.

Two settings available on single-line text layers only. They handle curved surfaces and text that becomes longer than the available space.

**Applies to:** [Text](/options/option-types/input-types/text.md) and [Number](/options/option-types/input-types/number.md) only. [Textarea](/options/option-types/input-types/textarea.md) has **Width** and **Height** instead. See [Position, size, and rotation](/options/product-personalizer/layer-settings/position-size-rotation.md).

## Curve

Bends the line of text along an arc.

<table><thead><tr><th width="180">Range</th><th width="150">Default</th><th>Behavior</th></tr></thead><tbody><tr><td>-100 to 100</td><td><code>0</code></td><td><code>0</code> is a straight line. Positive values curve one way, negative the other</td></tr></tbody></table>

**When to use it**

Use it for text on a round surface, such as a mug, a plate rim, a ring band, a bangle, a badge, or a bottle label. On these products, straight text does not match the shape of the product.

**Setting the value**

<table><thead><tr><th width="230">Try</th><th>For</th></tr></thead><tbody><tr><td>A small value, 10 to 30</td><td>A gentle bend, matching a large-diameter surface such as a plate rim</td></tr><tr><td>A larger value</td><td>A tighter curve, for a ring band or a small bangle</td></tr><tr><td>A negative value</td><td>The curve bending the other way — text below the centre of a circle rather than above it</td></tr></tbody></table>

Set the value against your own product photo. The correct value depends on the curvature in your image, so there is no standard value.

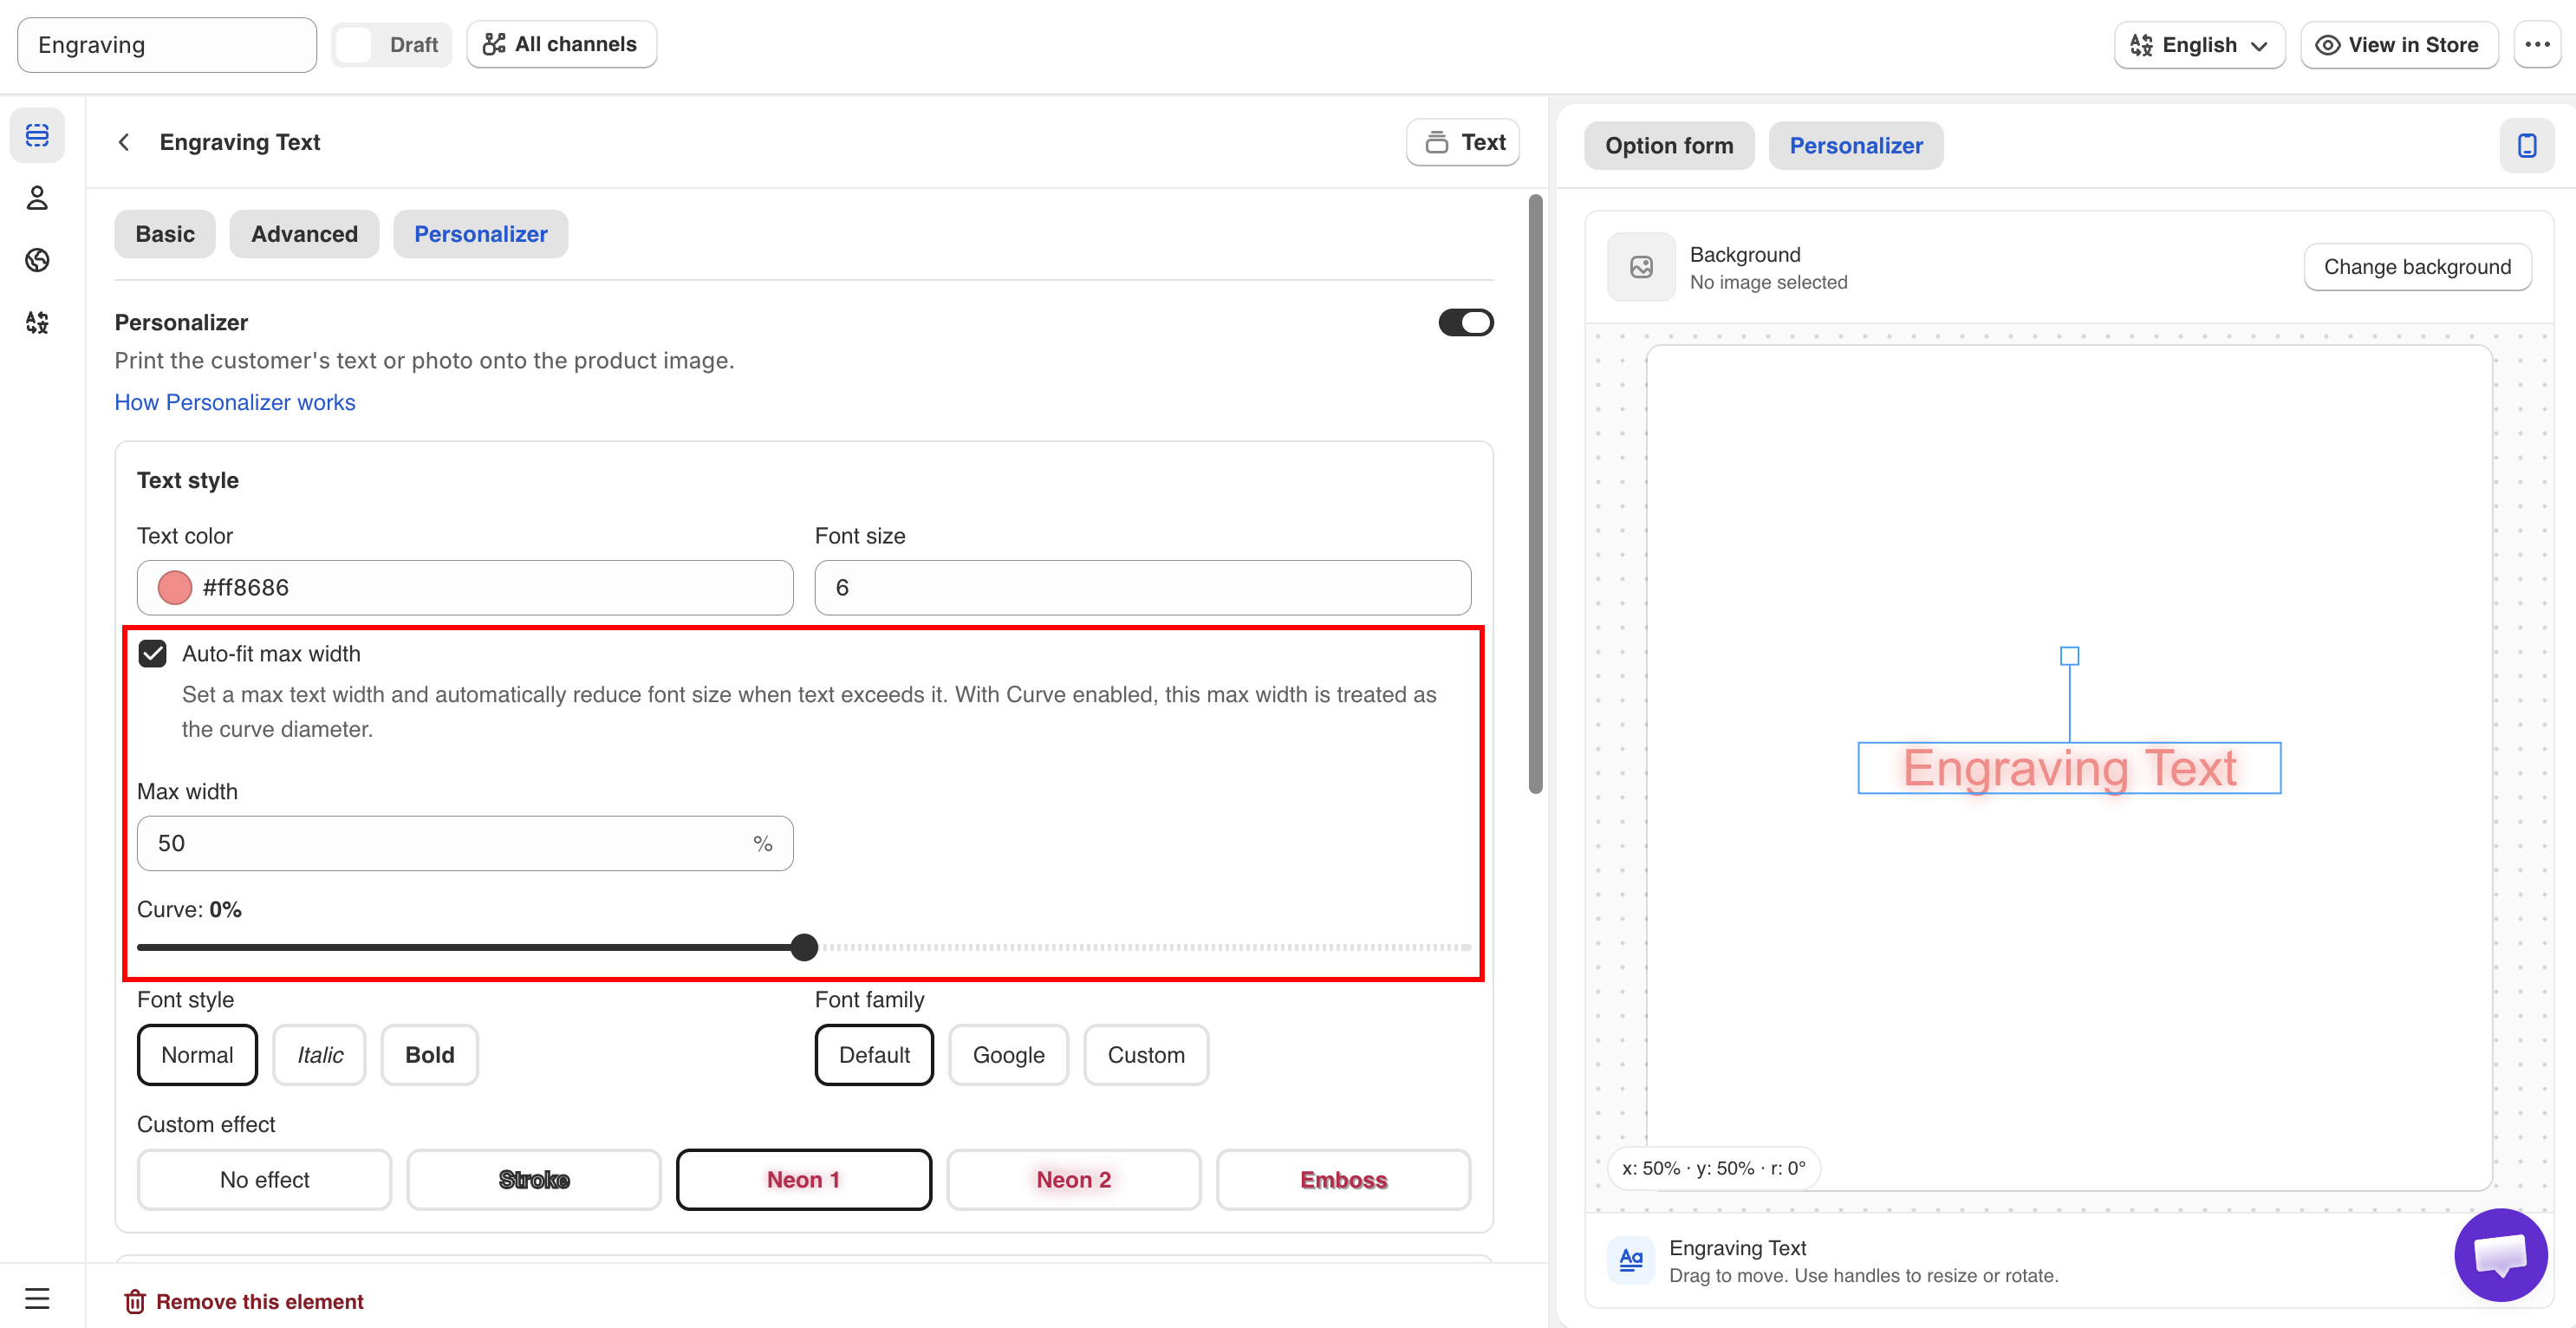
<figure><img src="https://3141646361-files.gitbook.io/~/files/v0/b/gitbook-x-prod.appspot.com/o/spaces%2FkMyxhAk2ZlJa4wZQGfBI%2Fuploads%2Fgit-blob-d7af220261ed70cc111ac8980d96cc6b96c3c830%2Fperson8.png?alt=media" alt="The Curve slider with the preview text bent along an arc on the product photo"><figcaption><p>Curve is what makes text on a mug or a ring look printed rather than pasted on.</p></figcaption></figure>

## Auto-fit max width

Reduces the font size automatically when the text becomes wider than the limit you set.

<table><thead><tr><th width="230">Setting</th><th width="150">Default</th><th>What it does</th></tr></thead><tbody><tr><td><strong>Auto-fit max width</strong></td><td>Off</td><td>Turns the behavior on, and reveals the setting below</td></tr><tr><td><strong>Max width</strong></td><td><code>50</code>%</td><td>The widest the text may become, as a share of the image</td></tr></tbody></table>

**When to use it**

Without it, a text layer grows as the customer types. A short name fits the engraving area, but a long one extends past the edge of the product.

With it enabled, long entries are reduced in size instead, so the text stays inside the area you defined.

{% stepper %}
{% step %}

### Turn on Auto-fit max width

On the text layer's **Personalizer** tab.
{% endstep %}

{% step %}

### Set Max width to the real printable width

The value is a percentage of the image. If the engraving area covers about a third of the photo's width, start with `33`.
{% endstep %}

{% step %}

### Test with your longest allowed entry

Enter the maximum your **Max character** limit allows. The text should be reduced in size and stay inside the area.
{% endstep %}

{% step %}

### Check it is still legible at that size

If a maximum-length entry is too small to read, reduce the **Max character** limit.
{% endstep %}
{% endstepper %}

{% hint style="info" %}
Enable this setting for any engraving or embroidery field. You cannot predict the length of the text a customer will enter.
{% endhint %}

## Using both together

The two settings interact. **With Curve enabled, Max width is used as the diameter of the curve.**

On a curved product, use both settings together. Max width sets the size of the arc, and Curve sets how far the text bends around it.

<table><thead><tr><th width="290">Product</th><th>Setup</th></tr></thead><tbody><tr><td>A mug with text around the side</td><td>Curve set to match the mug's curvature, auto-fit on with a max width matching the printable band</td></tr><tr><td>A ring band</td><td>A stronger curve, a small max width, and a tight <strong>Max character</strong> limit</td></tr><tr><td>A flat engraved plate</td><td>Curve at <code>0</code>, auto-fit on</td></tr><tr><td>A jersey number</td><td>Curve at <code>0</code>, auto-fit off — one or two characters cannot overflow</td></tr></tbody></table>

## Pair them with a character limit

These settings make long entries fit the space, but they do not limit the length. A forty-character entry on a twelve-character plate is reduced to a size you cannot produce.

Set a [Max character](/options/option-types/shared-settings/limits.md#min-and-max-character) limit that matches what you can produce, and enable the [Character counter](/options/option-types/shared-settings/limits.md#character-counter) so the customer can see the limit.

## Notes

* Both settings are available for **Text** and **Number** only.
* **Curve** has no effect on **Textarea**, because multi-line text cannot follow a single arc.
* **Auto-fit** only reduces the font size. It does not enlarge short text to fill the available space.
* Neither setting changes the actual product or production result. They only adjust the preview to better match the final result.
