> For the complete documentation index, see [llms.txt](https://docs.globo.io/llms.txt). Markdown versions of documentation pages are available by appending `.md` to page URLs; this page is available as [Markdown](https://docs.globo.io/options/product-personalizer/layer-settings/image-layers.md).

# Image layers

Draw an uploaded photo or a chosen design onto the product, masked into a shape and fitted the way you want.

An image layer draws a picture onto the product photo. The image is either a file the customer uploaded, or an image attached to the value they selected.

**Applies to:** [File upload](/options/option-types/input-types/file-upload.md), and eight selection types: [Dropdown](/options/option-types/selection-types/dropdown.md), [Color dropdown](/options/option-types/selection-types/color-dropdown.md), [Image dropdown](/options/option-types/selection-types/image-dropdown.md), [Radio button](/options/option-types/selection-types/radio-button.md), [Checkbox](/options/option-types/selection-types/checkbox.md), [Button](/options/option-types/selection-types/button.md), [Color swatch](/options/option-types/selection-types/color-swatch.md), [Image swatch](/options/option-types/selection-types/image-swatch.md).

## Where the image comes from

<table><thead><tr><th width="290">Option type</th><th>The layer draws</th></tr></thead><tbody><tr><td>File upload</td><td>The file the customer uploaded</td></tr><tr><td>The eight selection types</td><td>The image attached to the option value they selected</td></tr></tbody></table>

For selection types, each value needs its own image in the values table. See [Working with option values](/options/option-sets/option-values.md).

## Settings specific to image layers

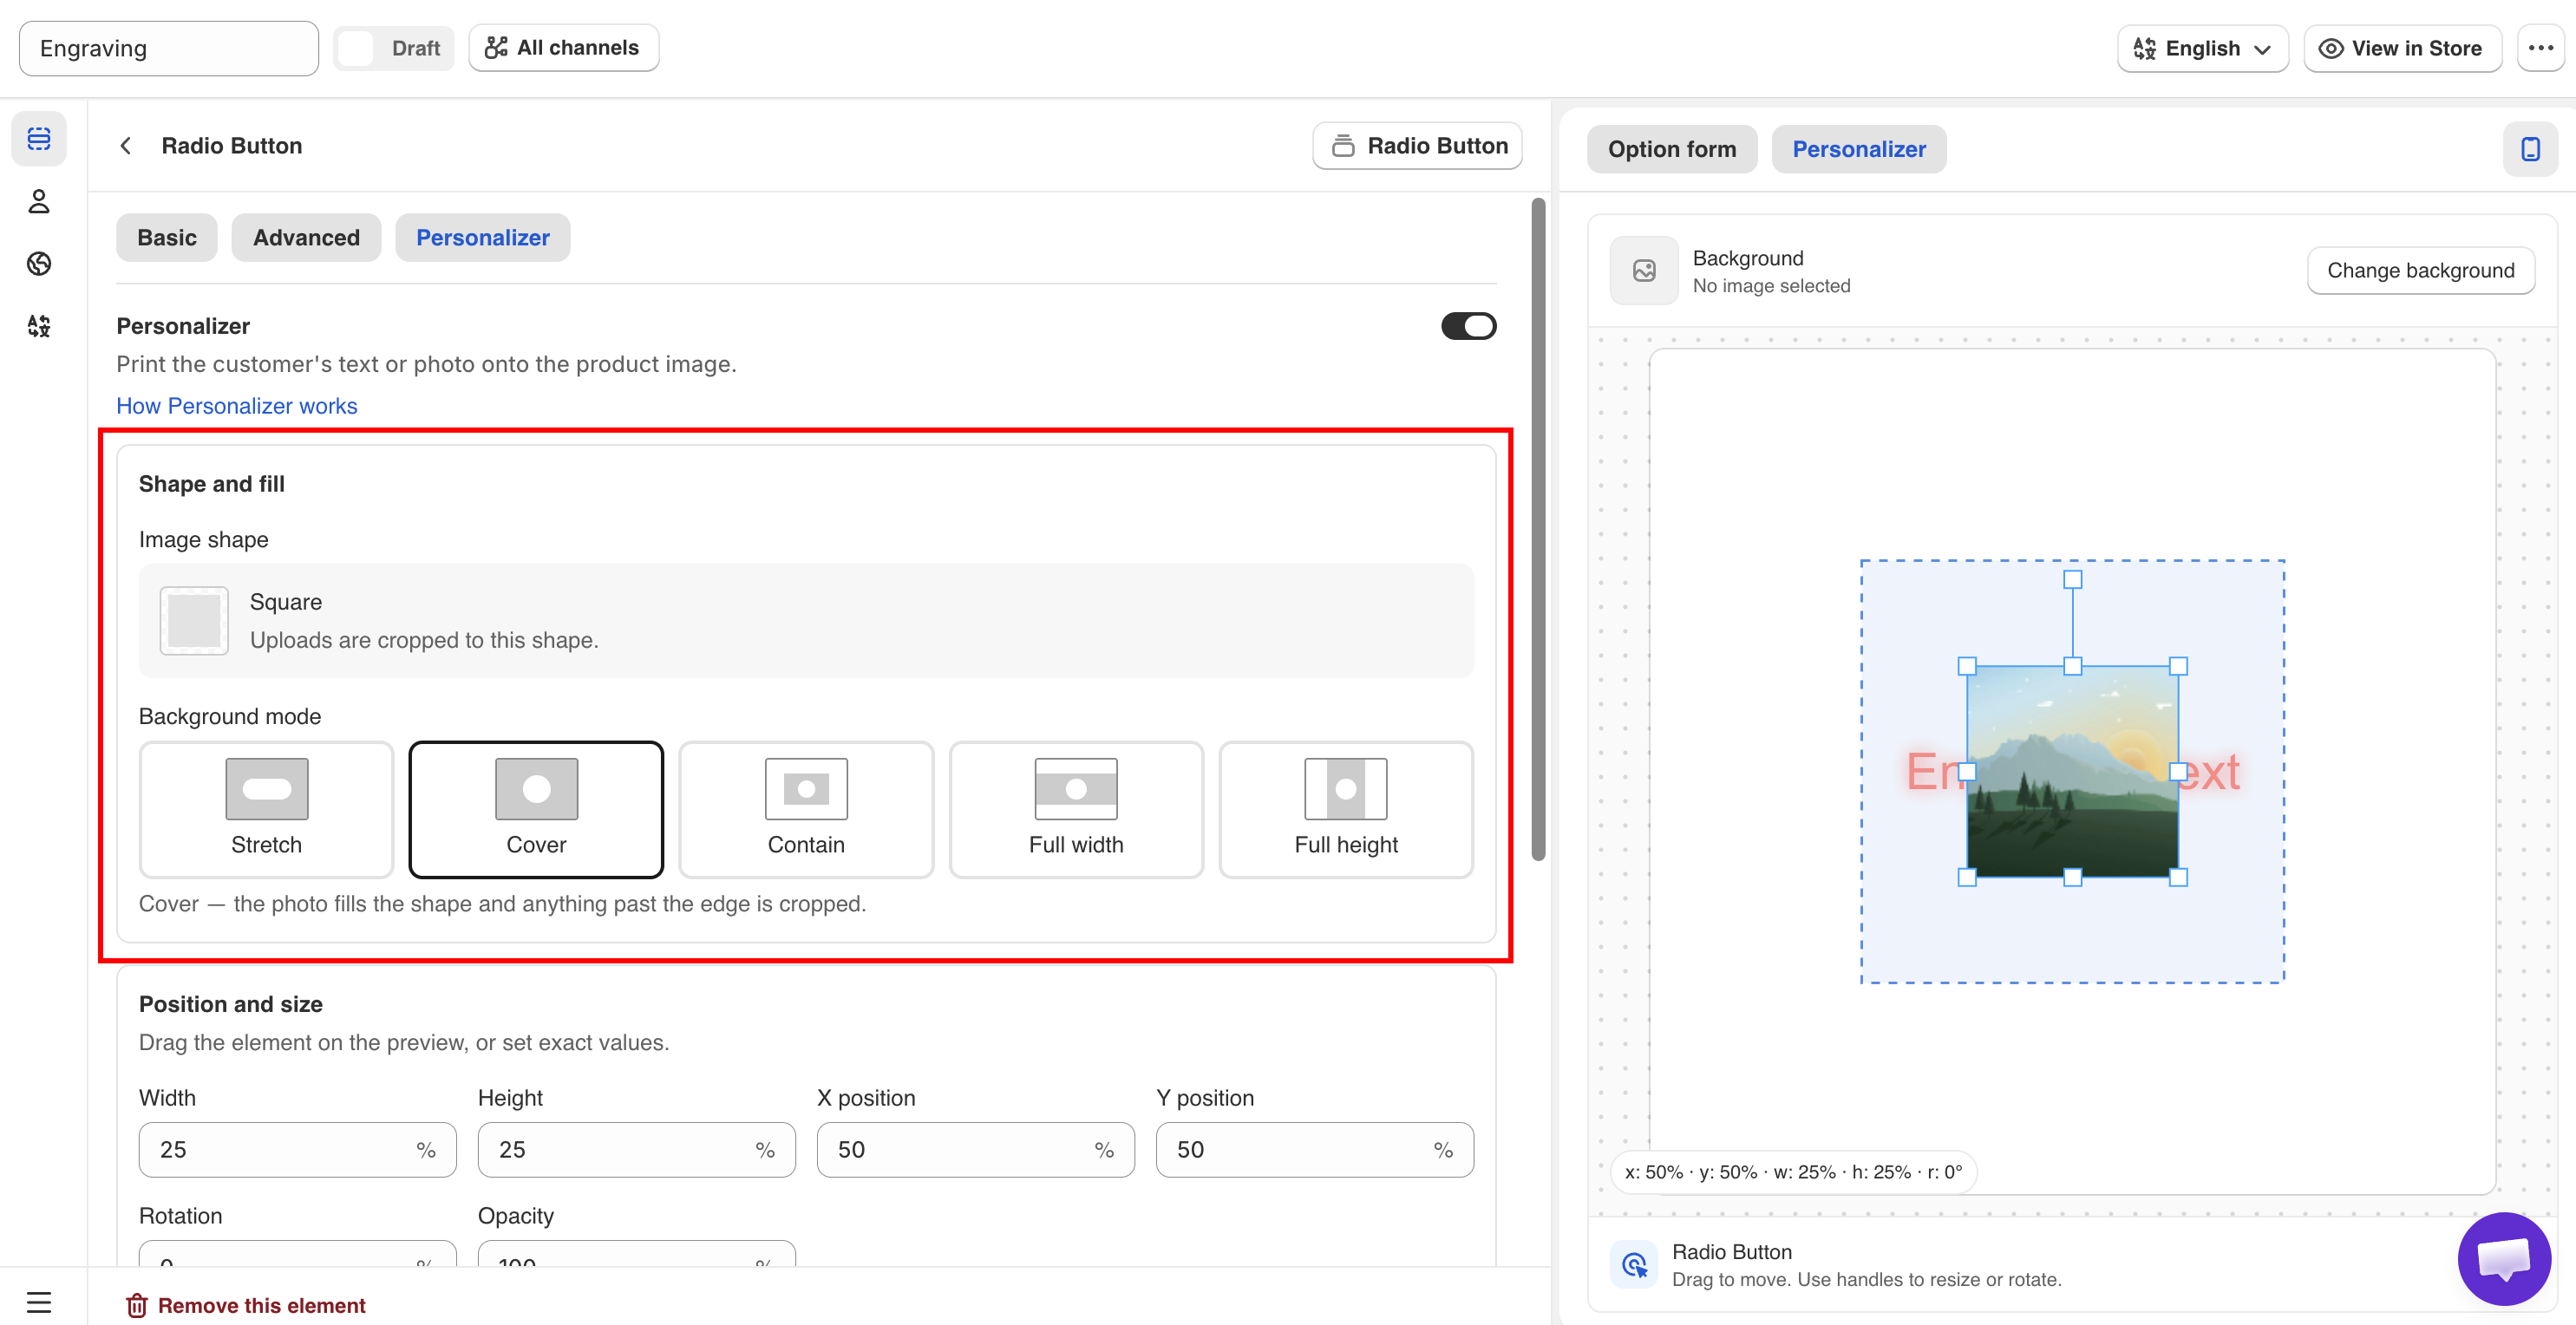
<table><thead><tr><th width="230">Setting</th><th width="170">Default</th><th>What it does</th></tr></thead><tbody><tr><td><strong>Image shape</strong></td><td>A supplied shape</td><td>The shape the image is masked into. Choose a preset, or upload your own</td></tr><tr><td><strong>Background mode</strong></td><td><strong>Cover</strong></td><td>How the image fits inside that shape</td></tr></tbody></table>

The remaining settings are shared with text layers: position, width, height, opacity, rotation, [crop area](/options/product-personalizer/layer-settings/clip-area.md), and [customer controls](/options/product-personalizer/layer-settings/customer-controls.md). See [Position, size, and rotation](/options/product-personalizer/layer-settings/position-size-rotation.md).

<figure><img src="https://3141646361-files.gitbook.io/~/files/v0/b/gitbook-x-prod.appspot.com/o/spaces%2FkMyxhAk2ZlJa4wZQGfBI%2Fuploads%2Fgit-blob-164b9b1295085cc911f2706892f578b55d80de01%2Fperson10.png?alt=media" alt="The image shape picker and background mode setting on an image layer"><figcaption><p>Shape decides the window; background mode decides how the image fills it.</p></figcaption></figure>

## Image shape

The image is masked into a shape, so it appears as part of the product rather than as a rectangle on top of it.

Select one of the supplied shapes, or upload your own. Use a custom shape to match an unusual aperture, such as a locket, a heart-shaped frame, or a phone camera cut-out.

<table><thead><tr><th width="290">Product</th><th>Shape</th></tr></thead><tbody><tr><td>A rectangular photo frame</td><td>A rectangle matching the aperture's proportions</td></tr><tr><td>A round locket or badge</td><td>A circle</td></tr><tr><td>A phone case with a camera cut-out</td><td>A custom shape you upload</td></tr><tr><td>A printed t-shirt panel</td><td>A rectangle matching the print area</td></tr><tr><td>A heart-shaped pendant</td><td>A custom shape</td></tr></tbody></table>

Match the shape's proportions to your real aperture. A square mask on a portrait frame crops the customer's photo unexpectedly.

## Background mode

Five options for how the image fits the shape.

<table><thead><tr><th width="200">Mode</th><th width="290">Behavior</th><th>Trade-off</th></tr></thead><tbody><tr><td><strong>Stretch</strong></td><td>Forces the image to fill the shape exactly</td><td><strong>Distorts</strong> anything whose proportions differ from the shape</td></tr><tr><td><strong>Cover</strong></td><td>Scales until the shape is filled, keeping proportions</td><td>Crops the edges. The default, and usually right</td></tr><tr><td><strong>Contain</strong></td><td>Scales until the whole image fits inside</td><td>Leaves empty space at two edges</td></tr><tr><td><strong>Full width</strong></td><td>Fills the shape's width</td><td>May overflow or fall short vertically</td></tr><tr><td><strong>Full height</strong></td><td>Fills the shape's height</td><td>May overflow or fall short horizontally</td></tr></tbody></table>

### Which value to use

<table><thead><tr><th width="290">Situation</th><th>Mode</th></tr></thead><tbody><tr><td>Customers upload their own photos, any shape</td><td><strong>Cover</strong> — always fills the window, never distorts</td></tr><tr><td>The whole image must be visible, cropping unacceptable</td><td><strong>Contain</strong>, and say in help text that empty space may show</td></tr><tr><td>Your own value images, all cropped consistently</td><td><strong>Cover</strong> or <strong>Stretch</strong> — with matching proportions they behave the same</td></tr><tr><td>A panoramic or banner-shaped area</td><td><strong>Full width</strong></td></tr><tr><td>A tall narrow area</td><td><strong>Full height</strong></td></tr></tbody></table>

{% hint style="warning" %}
Do not use **Stretch** for customer uploads. A portrait photo placed in a landscape-shaped area will appear distorted. **Cover** crops the image instead, producing a more natural result.

Use **Cover** together with the [image editor](/options/option-types/input-types/file-upload.md) for the upload option, so customers can crop their photos to the correct shape before they appear in the preview.
{% endhint %}

## Example configuration

For an option that lets the customer upload a photo and see it in a frame:

<table><thead><tr><th width="290">Setting</th><th>Value</th></tr></thead><tbody><tr><td>Option type</td><td>File upload, required</td></tr><tr><td>Allowed extensions</td><td><code>jpg</code>, <code>jpeg</code>, <code>png</code></td></tr><tr><td>Enable image editor</td><td>On, so customers crop before uploading</td></tr><tr><td>Help text</td><td><code>JPG or PNG, at least 1500 × 1500 pixels</code></td></tr><tr><td>Image shape</td><td>Matching your frame aperture</td></tr><tr><td>Background mode</td><td><strong>Cover</strong></td></tr><tr><td>Width and height</td><td>Sized to the aperture in the photo</td></tr><tr><td>Crop area</td><td>On, matching the aperture</td></tr><tr><td>Allow customers to</td><td><strong>Change position</strong> and <strong>Resize</strong>, so they can frame their photo</td></tr></tbody></table>

## Selection types as image layers

To let the customer select a design instead of uploading one:

{% stepper %}
{% step %}

### Add a selection option with an image per value

Use an [Image swatch](/options/option-types/selection-types/image-swatch.md) for a visible grid, or an [Image dropdown](/options/option-types/selection-types/image-dropdown.md) for a long list.
{% endstep %}

{% step %}

### Upload a design image on each value

Add the image in the values table. Use consistent proportions across all values.
{% endstep %}

{% step %}

### Turn on the Personalizer

Then set the image shape and background mode.
{% endstep %}

{% step %}

### Position and size the layer

Set where the design appears on the product.
{% endstep %}

{% step %}

### Leave customer controls off

You have already positioned the design, so the customer does not need to move it.
{% endstep %}
{% endstepper %}

A multi-select option can create several image layers at the same time, which may cause them to overlap. Either limit the option to one selection or position the layers so they do not overlap.

## Notes

* An image layer displays nothing until a file is uploaded or a value with an image is selected. Unlike text layers, it has no default value.
* Uploaded images can be large. Use **Cover** and a **Crop area** to keep the preview within the defined area.
* Uploaded images are displayed at their original resolution, so a small file may appear blurry when enlarged. Specify a minimum image size in the help text.
* A custom shape is uploaded to your store's files and can be reused across multiple options.
