
Test like a customer
Fill in the preview form, upload a test photo, and pick fonts and colors to see the design exactly as a customer would.
The Preview form in the builder is connected to the Personalizer editor. Whatever you type, upload, or select in the preview is drawn on the product image, so you can check the design with real content before you publish.
Test values are for checking only. They are not saved with the option set.
Before you start
- At least one option with the Personalizer turned on, and a background set. See Set up the Personalizer.
Steps
-
Type real text
In the Preview, type into each text field. Use a realistic entry, such as a full name rather than
test. The text replaces the default value on the product image as you type. -
Pick values
Select values in the selection options. Each image element shows the image of the value you picked.
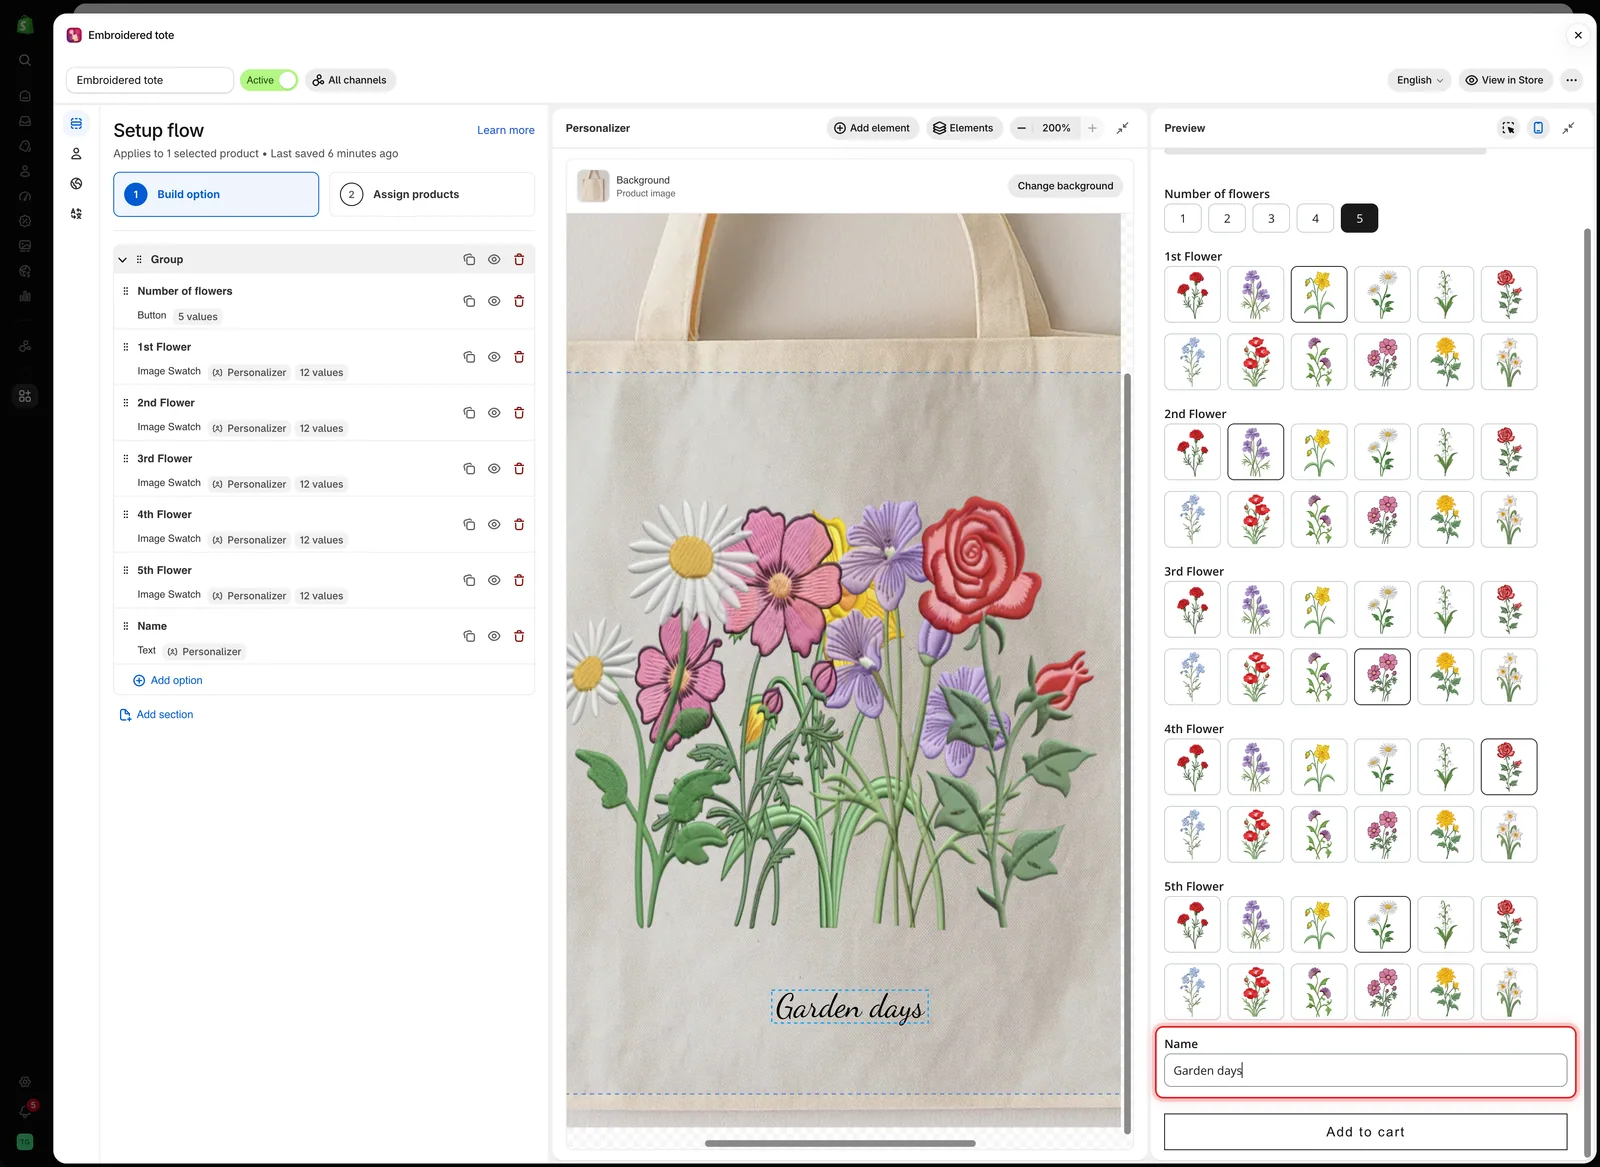
The flowers and the name chosen in the preview form are drawn on the tote in the editor.
-
Upload a test photo
In a File upload option, select Choose file and pick a photo from your computer. It appears inside the element’s shape and print area.
The photo stays in your browser. It is not uploaded to your store.
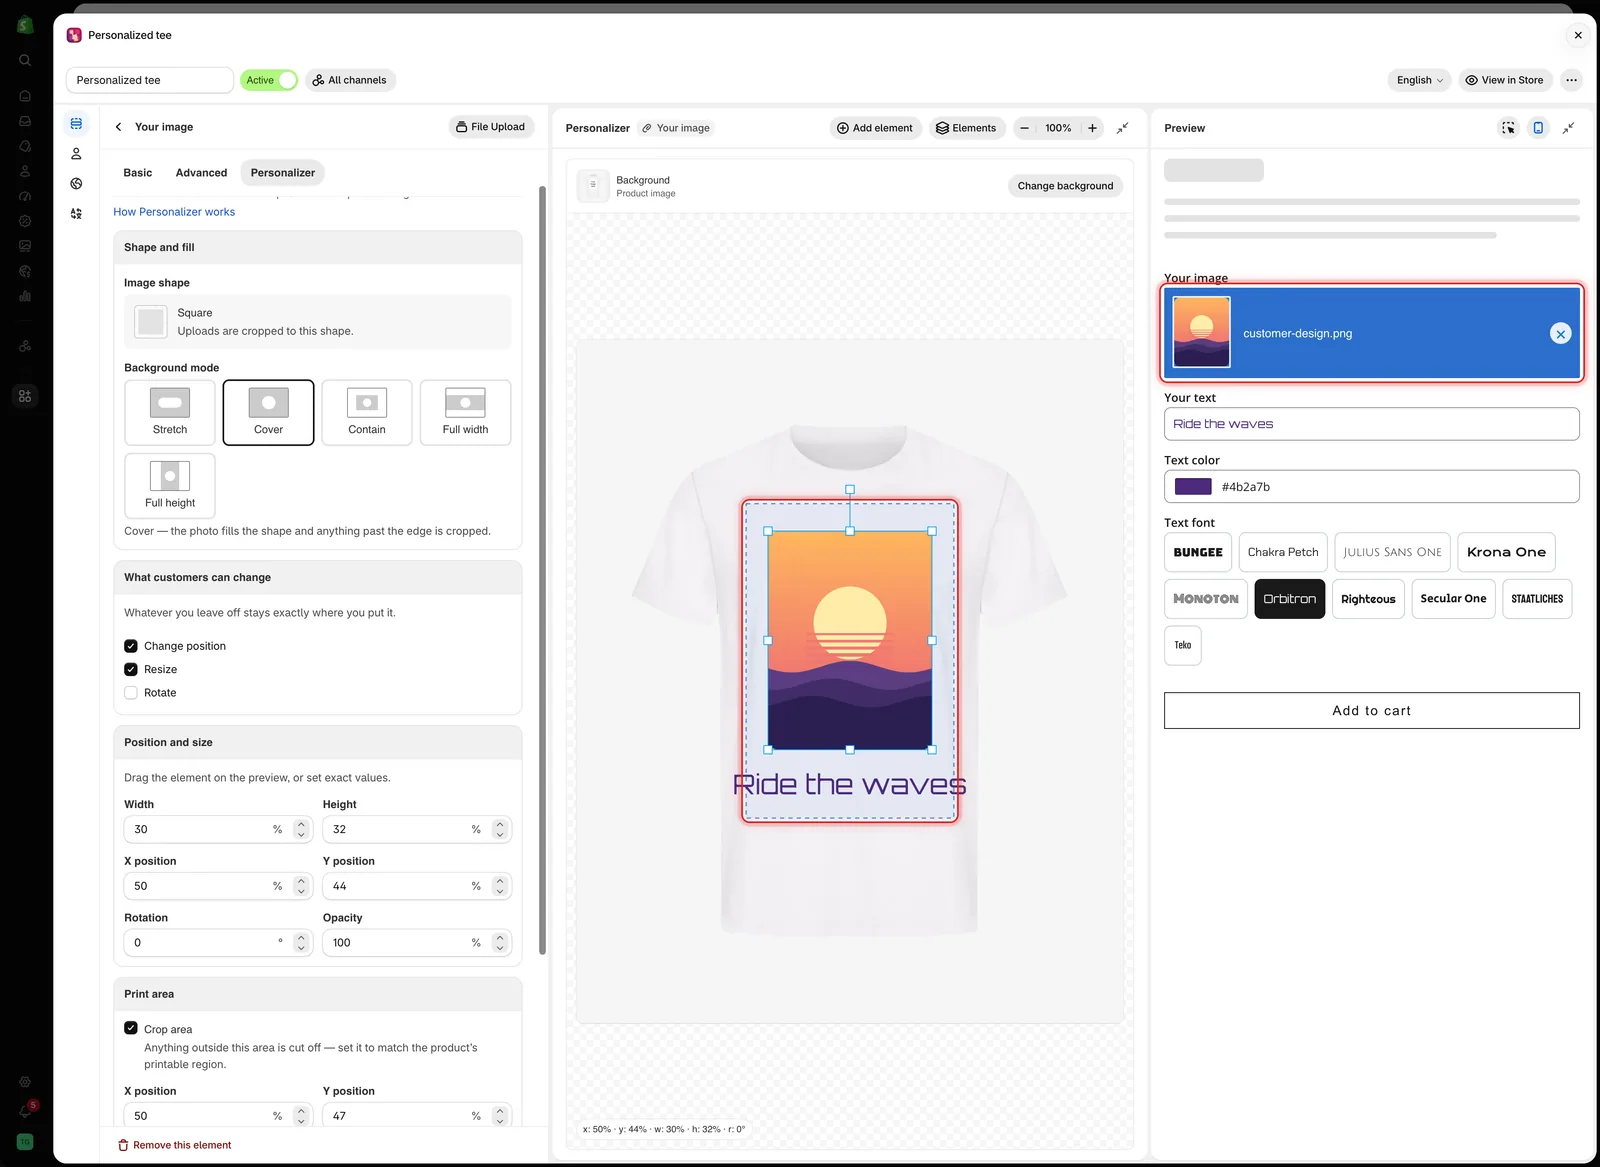
A photo attached in the preview is placed inside the element's print area, just as a customer's upload would be.
-
Pick a font and a color
If customers choose the font or color in another option, pick a few in the preview. The text on the product image changes with each choice. See Let customers pick font and color.
-
Try the extremes
Test the cases that break designs:
- The longest text your Max character limit allows.
- A one-character entry.
- A tall photo and a wide photo.
- Every value of each selection option.
-
Check desktop view
Select Show desktop view in the preview header. The Option form tab shows the product image with the design next to the form, as a product page would. See Desktop view.
-
Test on your storefront
Save the option set, then select View in Store. Repeat the checks on the real product page, and once on a phone.
What to check
| Check | If it fails |
|---|---|
| Long text stays on the product | Turn on Auto-fit max width, or lower Max character |
| Text is readable on the photo | Change the color, or add a stroke |
| Photos fill the shape without stretching | Set Background mode to Cover. See Shape and fill |
| Nothing spills past the printable area | Turn on Crop area. See Print area |
| Elements do not cover each other | Move one, or use Elements to find the hidden one. See Elements |
Notes
- Test values are kept while you edit settings, and cleared when you leave the option set.
- The preview uses the product chosen under Change background. Each storefront product uses its own photo, so check a few products.
- The builder preview does not use your theme’s fonts and spacing. View in Store shows the real result.
Was this helpful?
Thanks for your feedback! Tell us what was missing
Report an issue