
Walkthrough: personalized t-shirt
Build a t-shirt where customers upload a photo, add a line of text, and pick its font and color, from an empty option set to a live product page.
This walkthrough builds one complete product: a t-shirt with the customer’s photo on the chest and a line of text below it. Customers choose the font and color of the text, and can move and resize their photo inside the print area.
Swap in your own product and wording. The same method works for a tote bag, a hoodie, or a poster.
Before you start
- A t-shirt product with a clear, front-facing photo first in its gallery. If it has color variants, give each variant its own photo.
- The Personalizer available on your plan. See Compare plans.
- The app embed turned on in your live theme.
Steps
-
Create the option set
Go to Option Sets > Create option set > Create from scratch and name it
Personalized tee. On Setup flow > Assign products, select your t-shirt. See Create an option set. -
Add the photo upload
On Setup flow > Build option, add a File upload option.
Field Value Why Name on product page Your imageWhat customers read Required field On Every shirt needs a photo Allowed extensions jpg,jpeg,pngFiles you can print from Help text JPG or PNG, at least 1500 × 1500 pixels.Sets the quality you need -
Turn on the Personalizer for the photo
Open the option’s Personalizer tab and turn on the Personalizer switch. The Personalizer editor appears.
-
Set the background
Select Change background. Choose Product image, First product image only, and your t-shirt, then select Select. See Choosing the background.
-
Shape, place, and limit the photo
On the Personalizer tab of
Your image:Card Setting Value Shape and fill Image shape Square Background mode Cover Position and size Width / Height 30/32X position / Y position 50/44, on the chestPrint area Crop area On X position / Y position 50/47Width / Height 38/46, the printable areaYou can drag the photo and the dashed crop area on the canvas instead of typing values. See The Personalizer editor.
-
Let customers frame their photo
In What customers can change, tick Change position and Resize. Leave Rotate off.
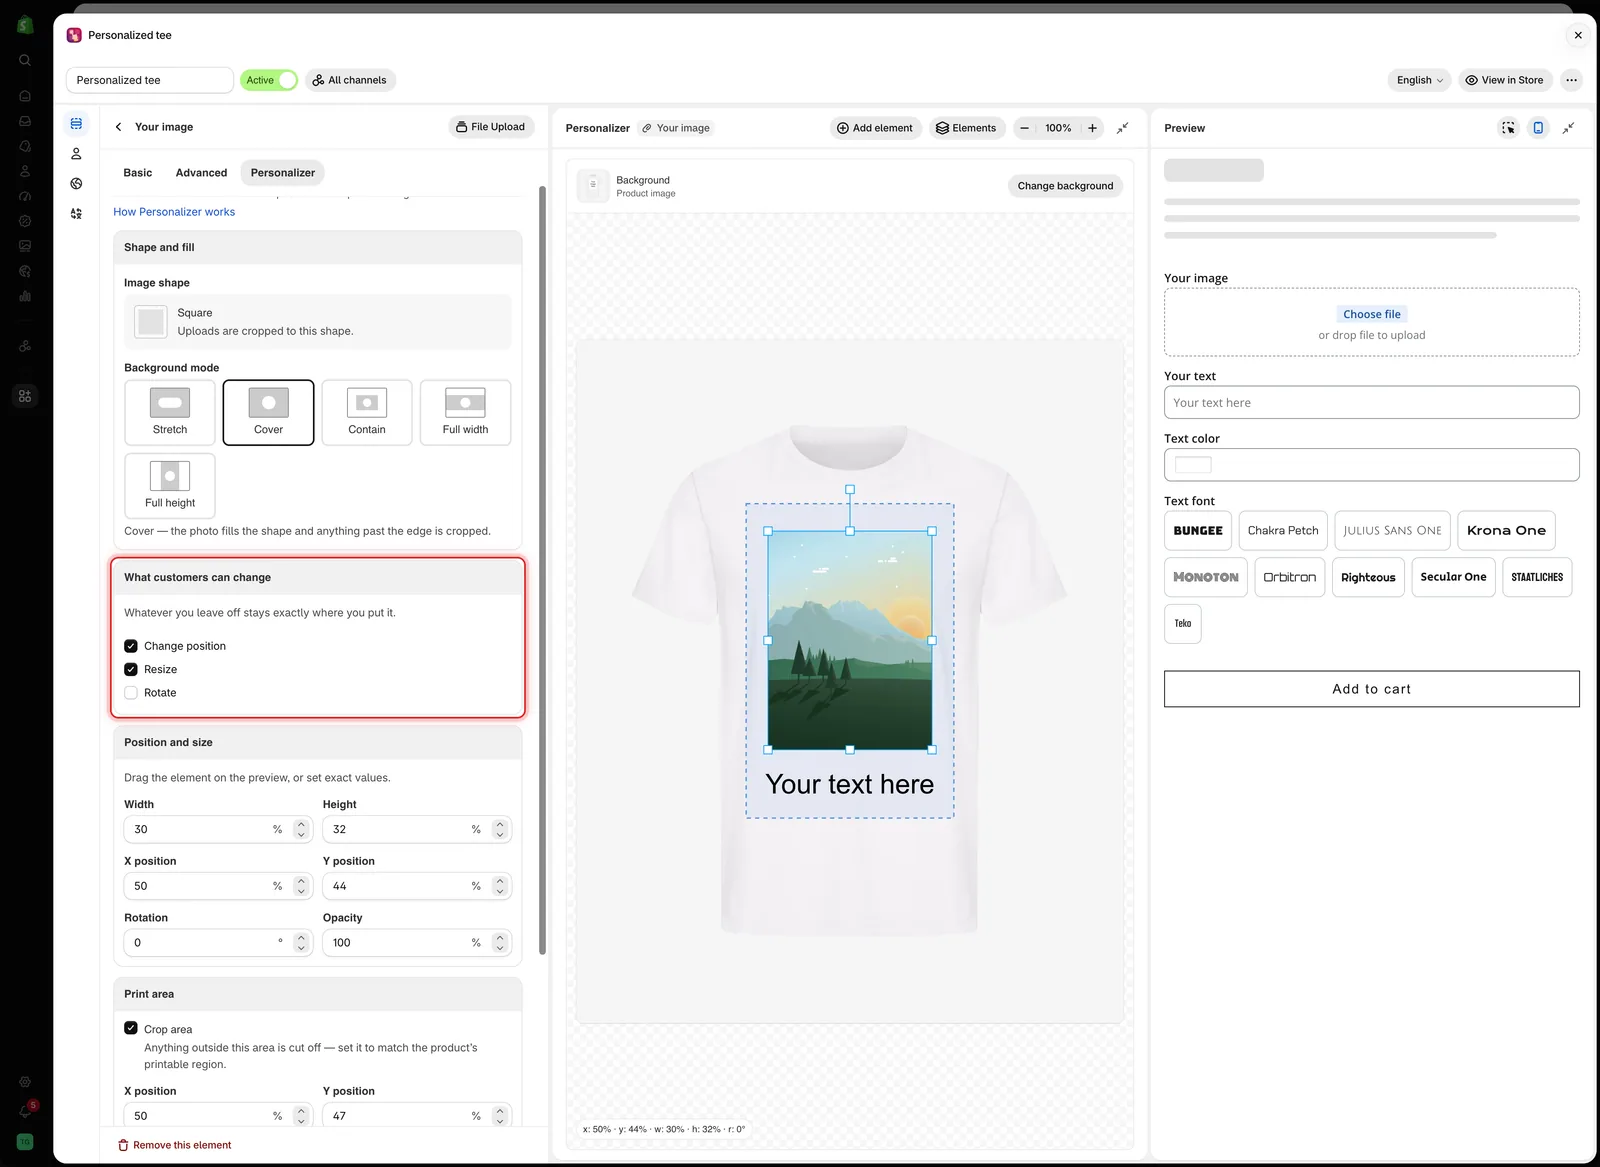
With Change position and Resize on, customers can frame their photo, but only inside the crop area.
-
Add the text
Add a Text option below the upload.
Field Value Why Name on product page Your textMax character 20What fits under the photo Default value Your text hereSo the design is never empty Then select Add element in the editor toolbar and pick
Your text. Drag it below the photo, and set its Font size in Text style. -
Let customers pick the font and color
On the Personalizer tab of
Your text, in What customers can change > Font and color:- Tick Font from a Font Picker option, then select Add font option. A Font picker opens. Name it
Text fontand add the fonts customers can choose. - Select Back to Your text.
- Tick Color from a Color Picker, Swatch or Dropdown option, select Add color option, and choose Color Picker. Name it
Text color. - Select Back to Your text.
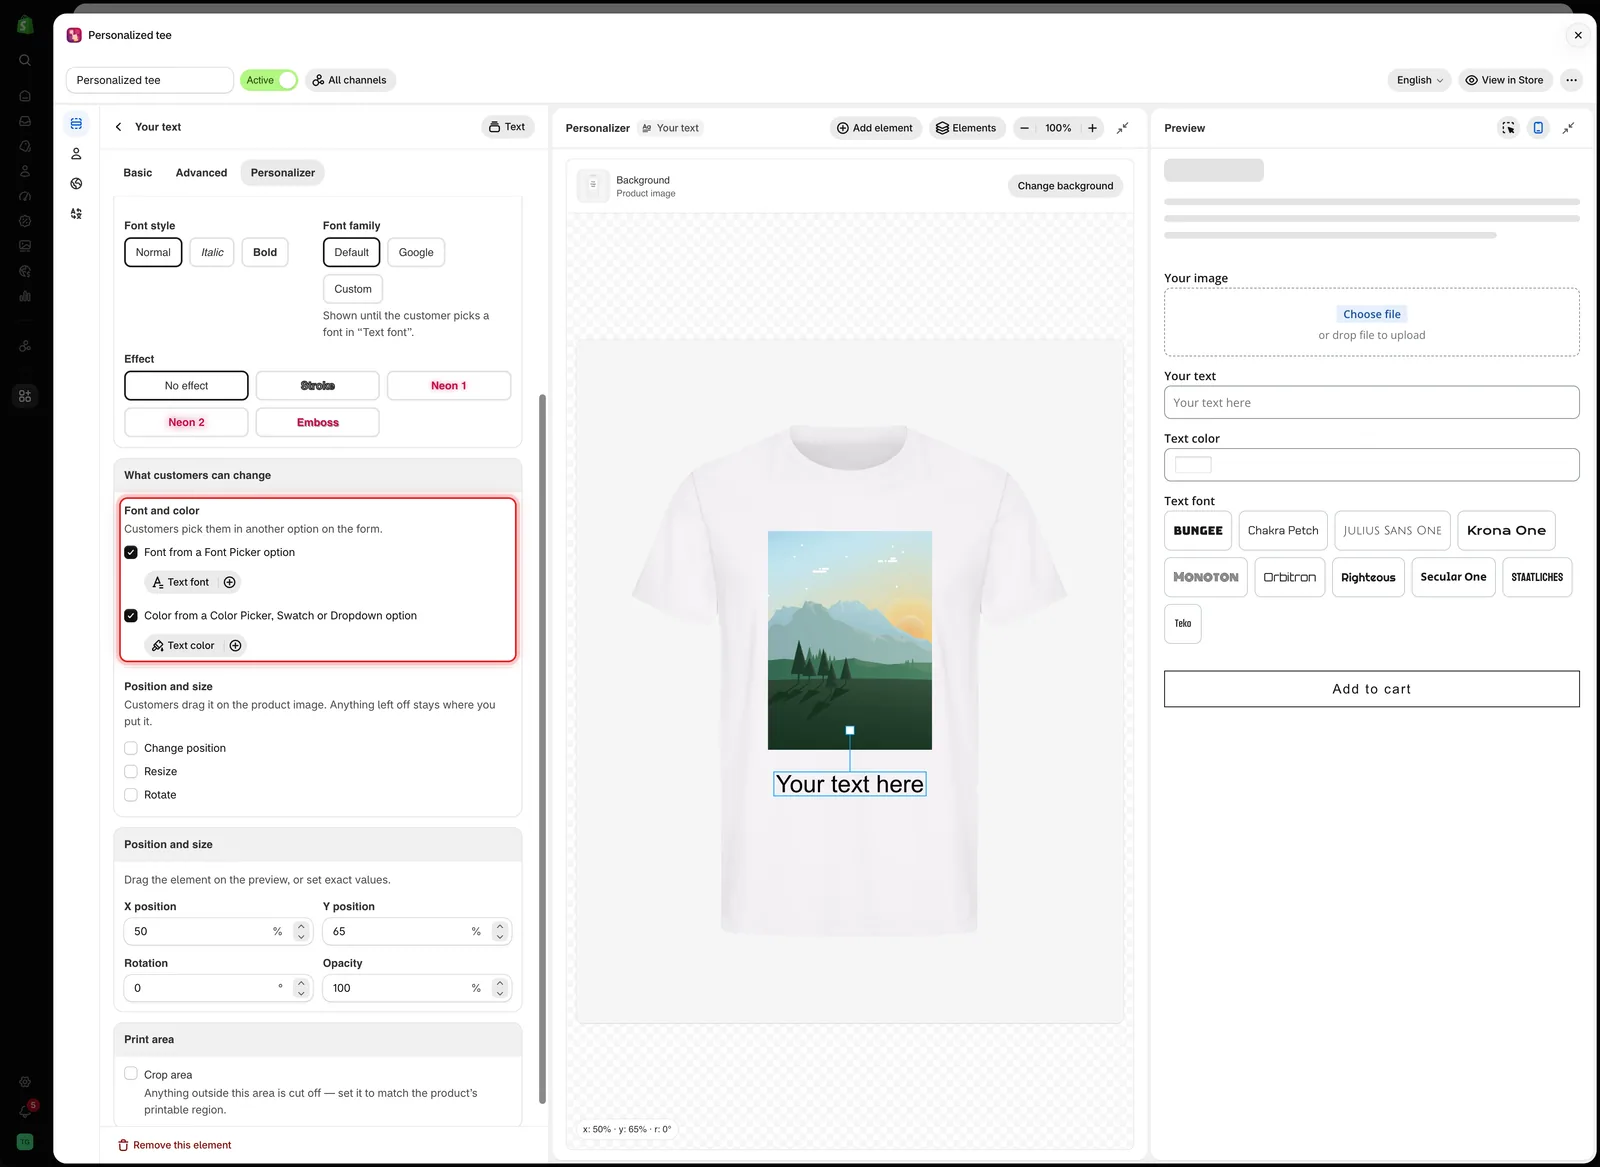
Your text now takes its font from Text font and its color from Text color.
- Tick Font from a Font Picker option, then select Add font option. A Font picker opens. Name it
-
Test it in the preview
In the Preview, upload a photo, type a line of text, and pick a font and a color. Check that the photo fills the square and the text stays readable.
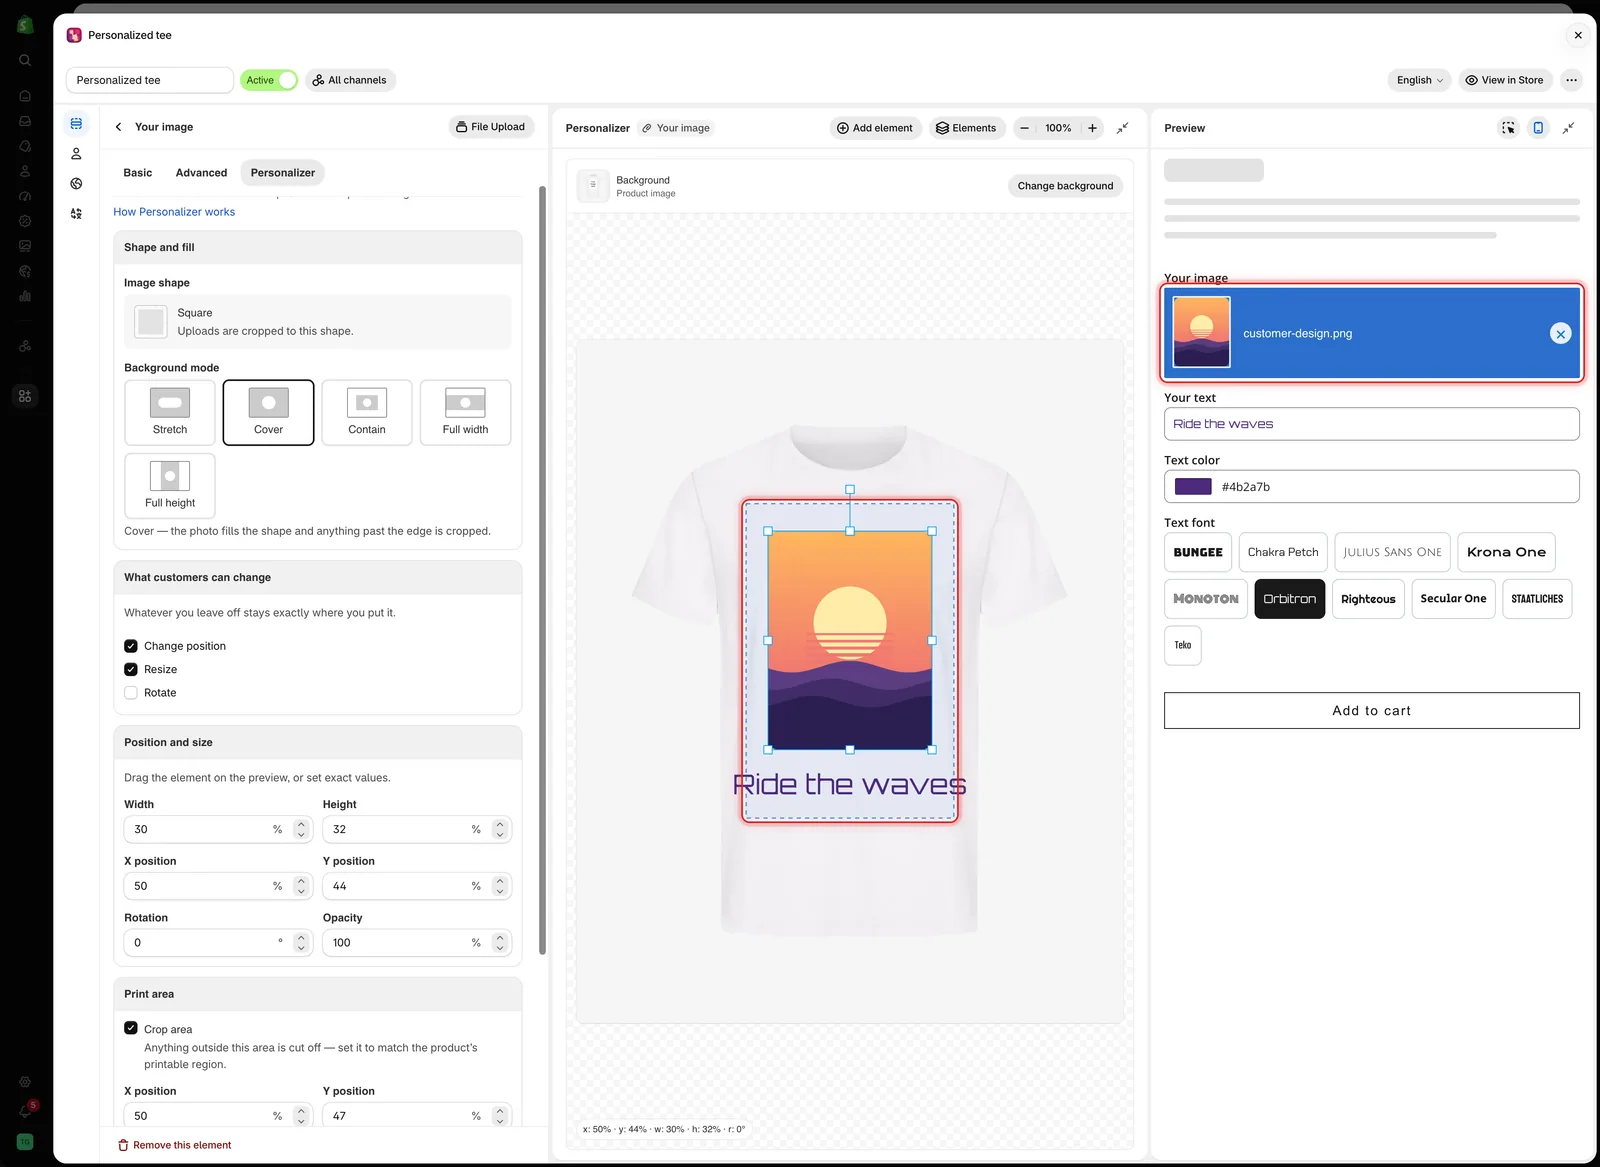
Every choice in the preview is drawn on the t-shirt straight away.
See Test like a customer.
-
Save, activate, and check the storefront
Select Save. Make sure the option set is Active and published to Online Store. Then select View in Store and Preview next to the t-shirt.
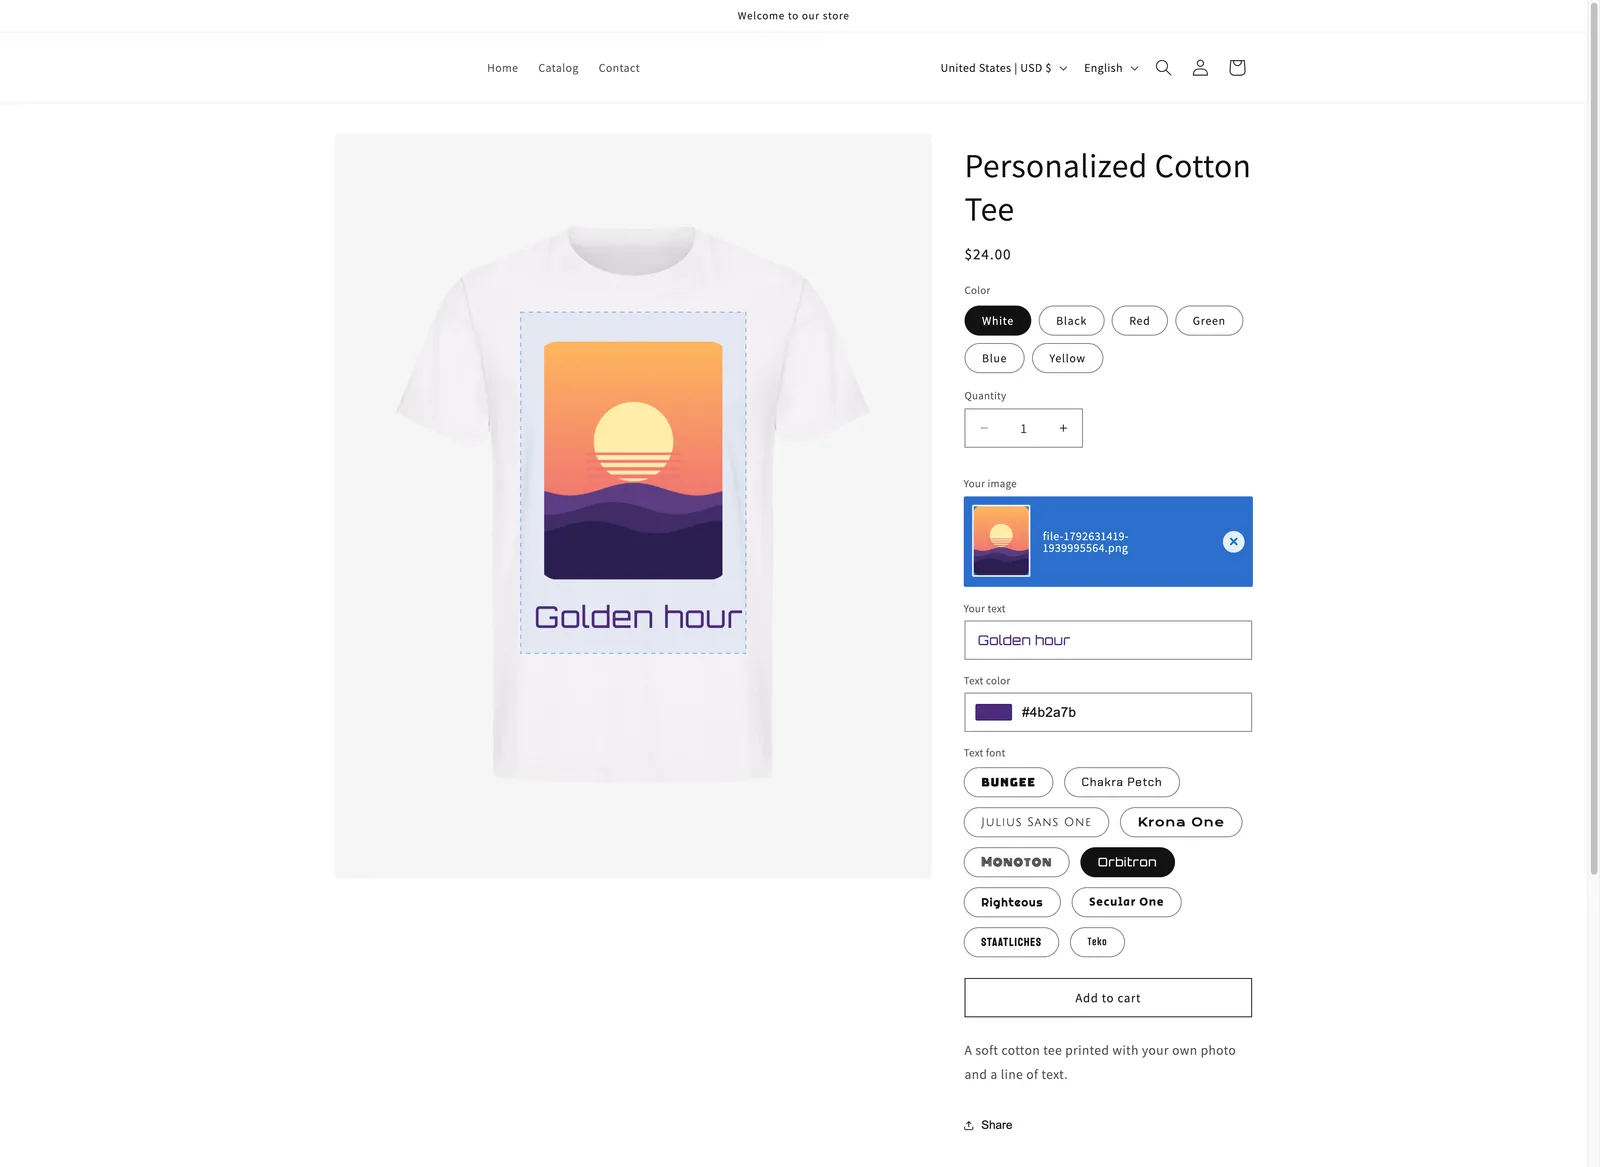
On the product page, customers see their photo and text on the shirt as they fill in the form.
-
Add it to the cart
Select Add to cart. The cart line shows the design, every choice, and Preview Your Design.
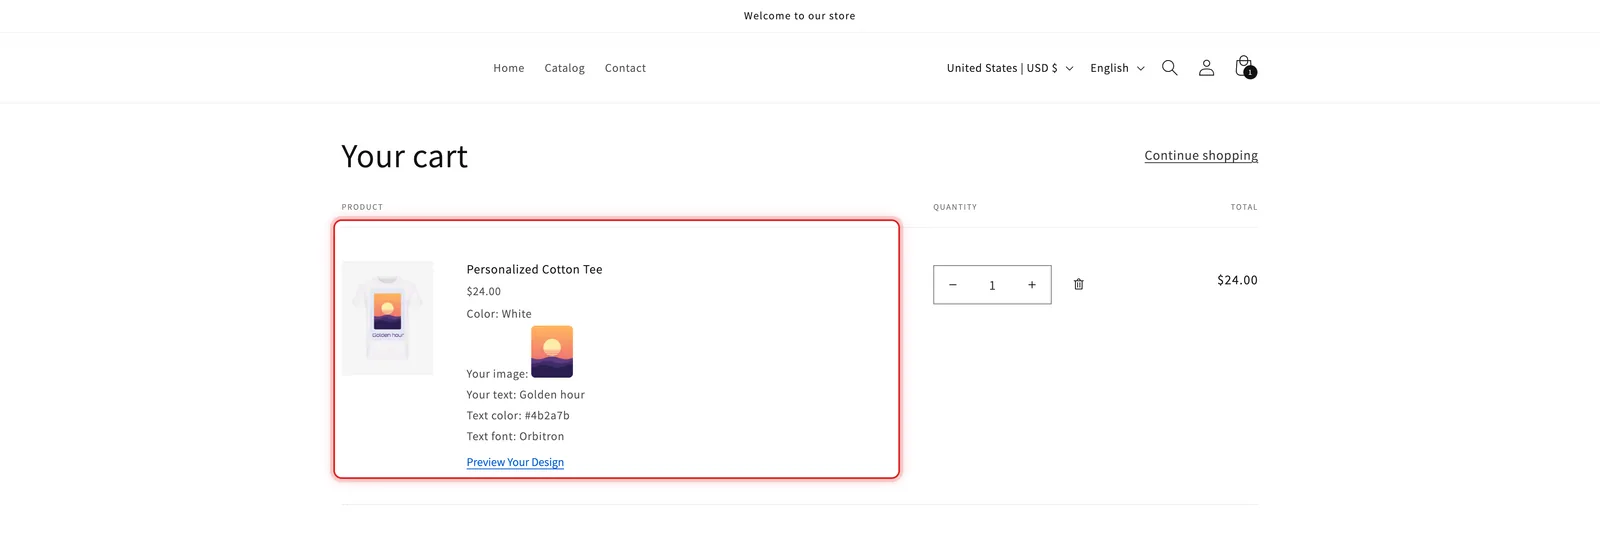
The cart keeps the design and all the details your team needs to produce it.
What to change for other products
| Product | Change |
|---|---|
| A tote bag | A larger print area, and image swatches if customers pick designs instead of uploading |
| A hoodie | A smaller print area higher on the chest |
| A poster | A print area covering almost the whole image, and Contain if no part of the photo may be cut |
| A dark shirt | A light default text color, or a stroke |
Was this helpful?
Thanks for your feedback! Tell us what was missing
Report an issue