
在訂單發票上顯示選項
將選項詳細資料加入由 Shopify 的 Order Printer 應用程式列印的發票。
使用 Shopify Order Printer 製作訂單發票
Product Options 應用程式與 Shopify 的 Order Printer 整合,讓選項詳細資料可以出現在列印的發票上。
設定步驟
-
在 Shopify 管理介面中前往 應用程式
-
在已安裝的應用程式中找到並選取 Order Printer
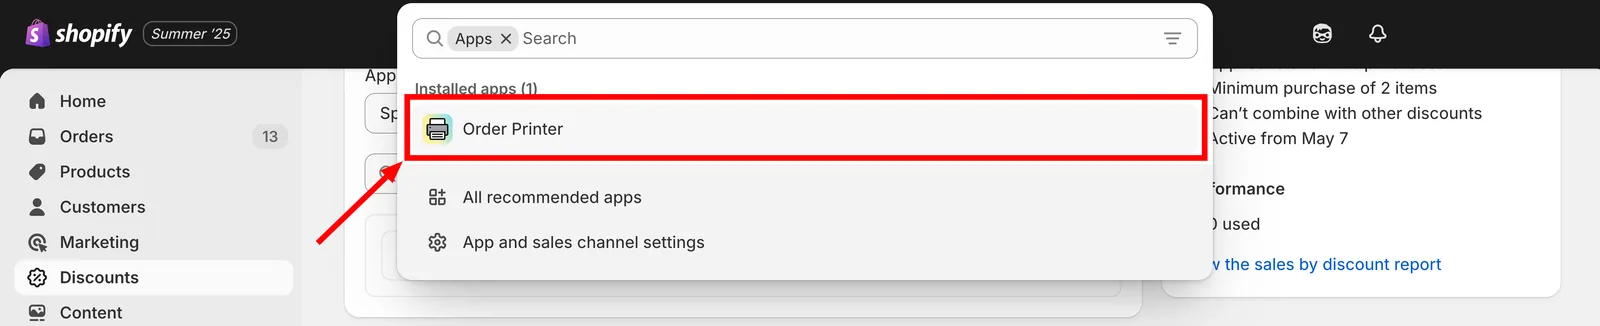
從已安裝的應用程式清單中開啟 Order Printer。
-
前往 Manage Templates(管理範本),然後選擇 Invoice(發票)
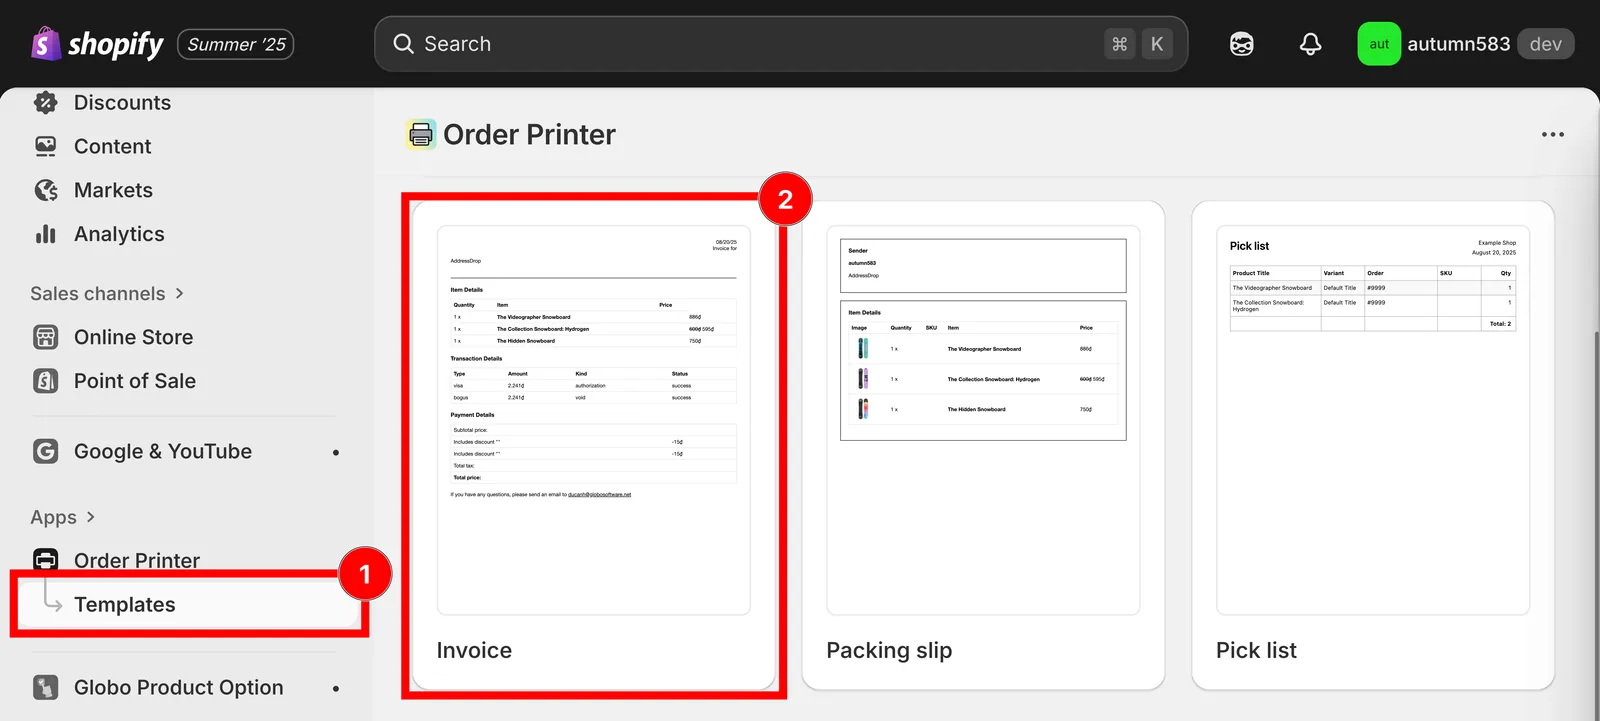
管理範本,然後開啟發票範本。
-
從提供的 GitHub 儲存庫下載發票範本
-
將這段程式碼複製到 Template Details(範本詳細資料)區段
<div class="gpo-properties">{% assign property_size = line_item.properties | size %}{% if property_size > 0 %}{% for p in line_item.properties %}<div class="gpo-property">{% assign first_character_in_key = p.first | truncate: 1, '' %}{% unless p.last == blank or first_character_in_key == '_' %}<span>{{ p.first }}: </span>{%- if p.last contains '/uploads/' -%}<a href="{{ p.last }}">{{ p.last | split: '/' | last }}</a>{%- else -%}{{ p.last }}{%- endif -%}{% endunless %}</div>{% endfor %}{% endif %}</div>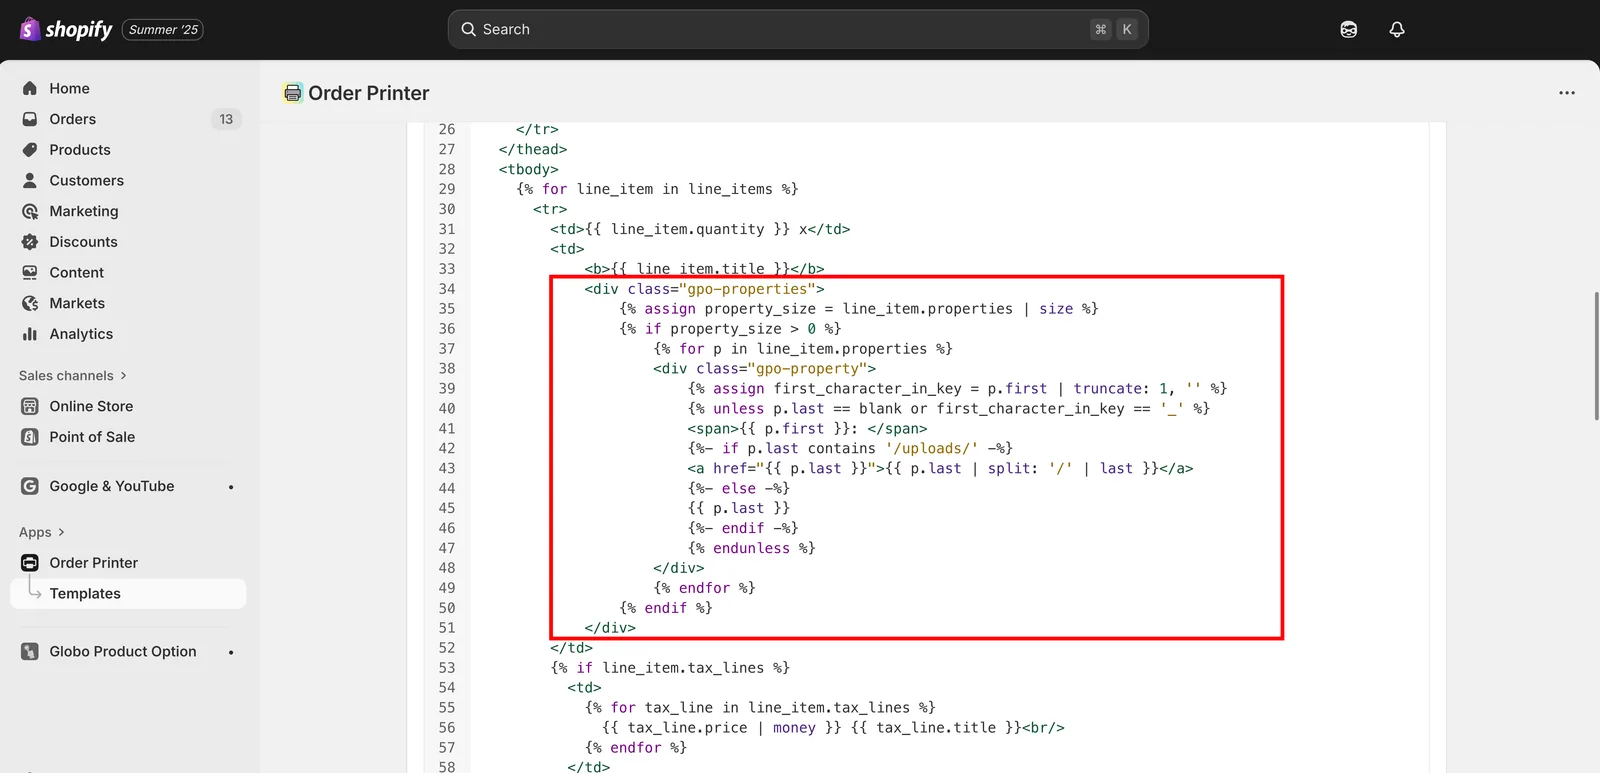
將程式碼貼到 Template Details 區段中。
-
點選 Save(儲存)完成變更
支援
這個頁面有幫助嗎?
感謝您的意見回饋! 告訴我們缺少了什麼
回報問題